As an Amazon Associate, we earn from qualifying purchases. Some links on this site are affiliate links at no extra cost to you. Our recommendations are based on thorough research and editorial judgment.
How to Mount LED Channels Under Cabinets
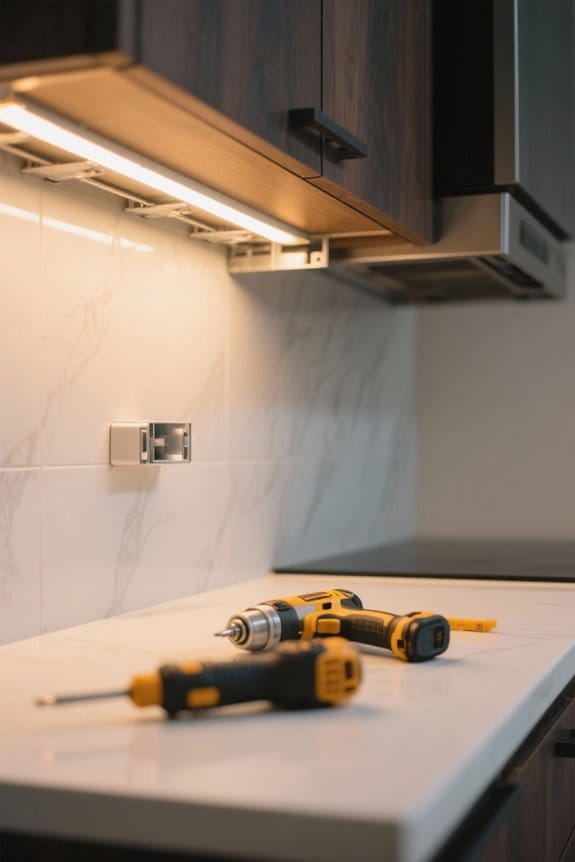
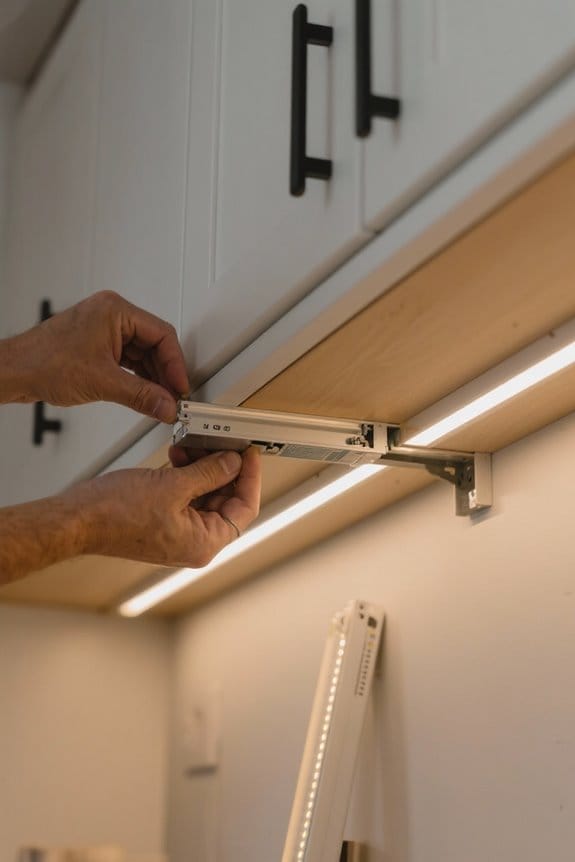
To mount LED channels under cabinets, begin by measuring each cabinet section for precise aluminum channel lengths. Secure mounting clips every 12 to 24 inches along the mark, using screws for stabilization. Snap the channels into place, ensuring a snug fit. Connect LED strips to the compatible power supply, checking polarity for accuracy. Inspect all connections and verify functionality. For ideal light distribution, consider installation position and angles. More detailed insights on materials and troubleshooting await.
Key Takeaways
- Measure and mark the length of each cabinet area for properly sized aluminum channels before installation.
- Secure mounting clips under cabinets using screws, ensuring accurate positioning for even alignment.
- Snap the aluminum channels into the mounted clips for a stable fit, accommodating the LED strips.
- Connect the LED strip wires to the power supply, verifying correct polarity for functionality.
- Ensure all components are compatible and check connections to prevent dimming or color issues.
Benefits of Using LED Channels Under Cabinets
You may be interested
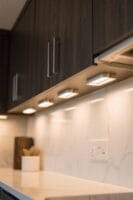

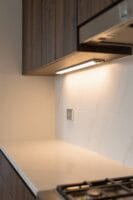
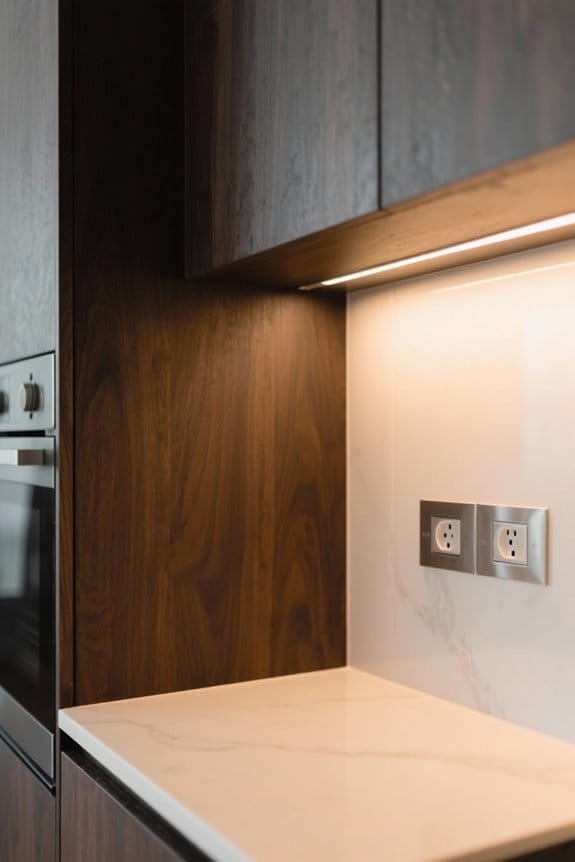
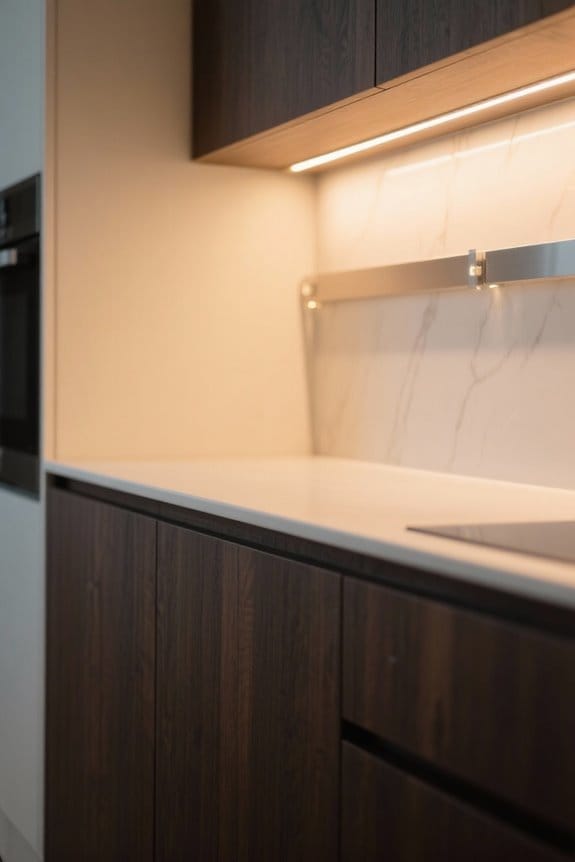
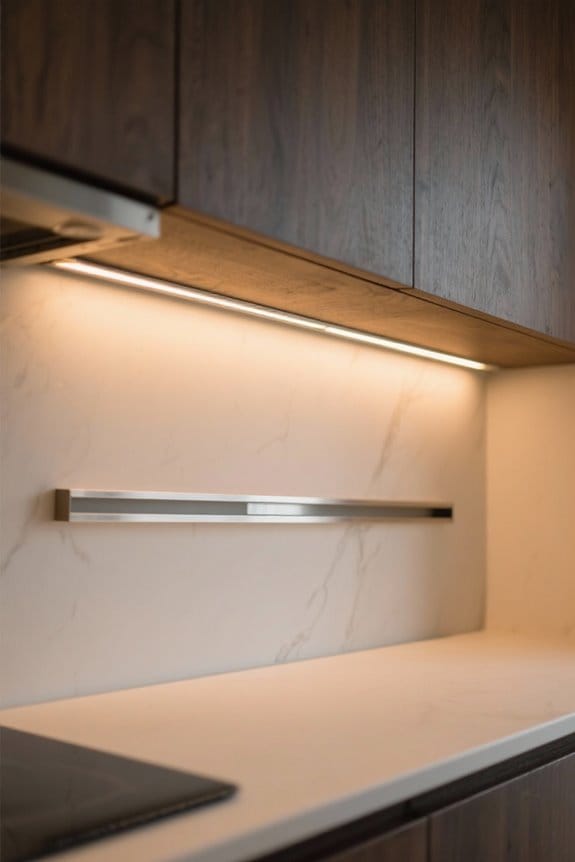
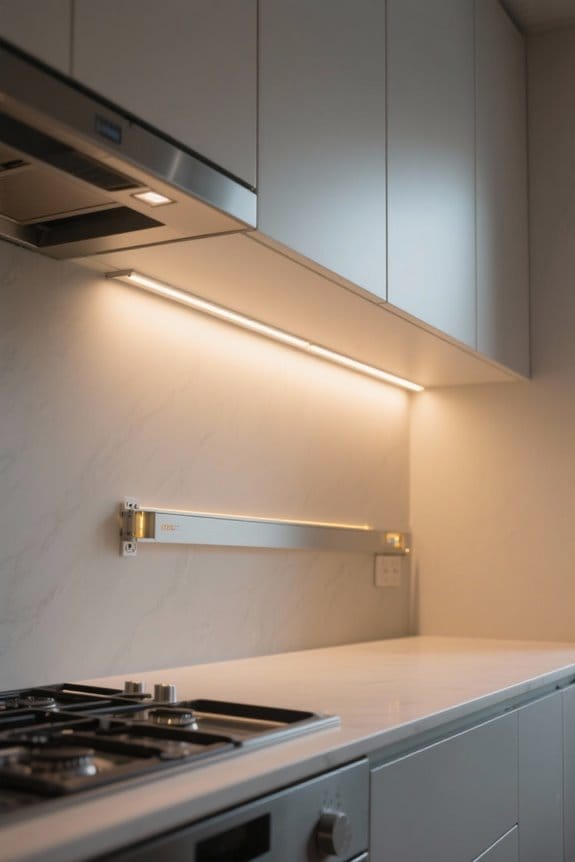
When considering a kitchen lighting upgrade, homeowners should recognize the substantial benefits of using LED channels under cabinets. These channels not only conceal unsightly wires, delivering a clean and professional look, but also improve light diffusion by creating a softer, more even illumination. This eliminates harsh shadows and hotspots, enhancing functionality. Moreover, utilizing aluminum channels plays an essential role in protecting LED strips from moisture and dust, thereby extending their lifespan in spill-prone areas. The customization and adjustment capabilities of LED channels allow for tailored lighting angles, promoting versatility for specific tasks or moods. Additionally, installing LED channels can greatly enhance energy efficiency, directing light precisely where needed and minimizing wasted power. Quality LED strips like the BTF-LIGHTING series offer 65,000 hours lifespan while maintaining excellent color accuracy with CRI ratings above 90+.
Required Materials for Installation
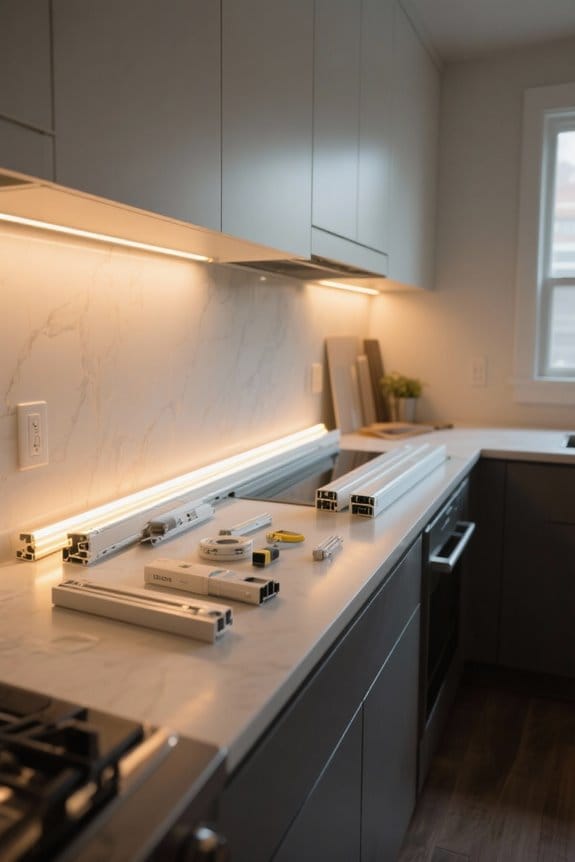
Before initiating a successful installation of LED channels under cabinets, gathering the appropriate materials is imperative for an efficient process. Start with LED strip lights tailored to your lighting needs. Choose a compatible aluminum channel to house these strips securely. Acquire mounting clips, which are essential for stabilization. Make sure you also have a power supply that matches the voltage and wattage of your LED strips, along with connectors for linking them. Include scissors to cut the strips to suitable lengths and a voltage tester to confirm safe connections. Remember that adhesive backing on the LED strip lights simplifies installation, but clean cabinet surfaces with rubbing alcohol for maximum adhesion. Proper preparation facilitates a smooth installation process for effective cabinet lighting. For optimal light distribution throughout your space, select channels with milky white covers that help reduce glare and create softer ambient lighting.
Step-by-Step Installation Process
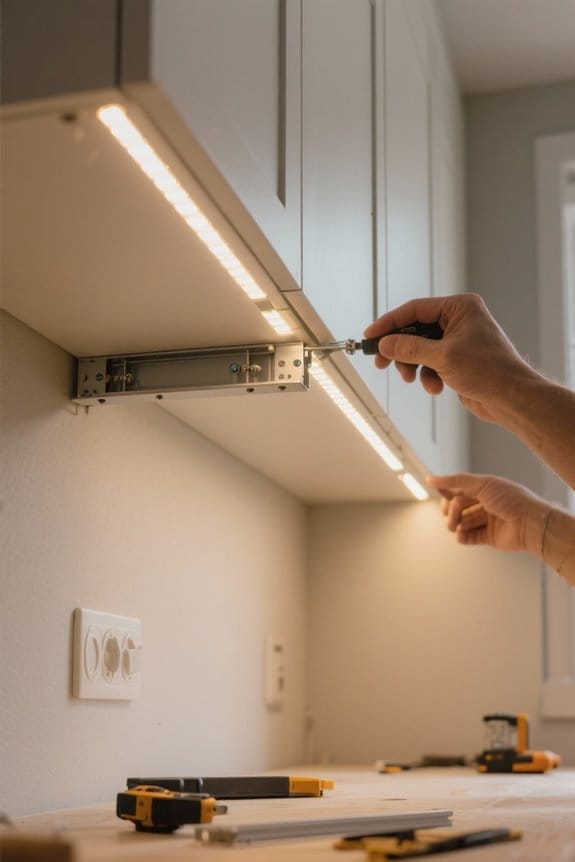
An effective installation of LED channels under cabinets begins with precise measurements. First, measure the length of each cabinet section to determine the necessary length of aluminum channels. Next, mark the positions for the mounting clips on the underside of the cabinets. Use a drill to secure these clips in place with screws. Carefully snap the aluminum channels into the mounted clips, ensuring stability and alignment. Remove the adhesive backing from the LED strip, pressing it firmly into the groove of the aluminum channel for secure placement. Finally, connect the LED strip’s wire to the power supply, ensuring correct polarity—red wire for positive and black wire for negative—for ideal functionality in your installation. The channels’ milky white diffuser helps distribute light evenly while preventing unwanted glare and hot spots in your under-cabinet lighting.
Tips for Effective Mounting
For best results in mounting LED channels under cabinets, maintaining a clean and dry surface is essential. Use a degreasing cleaner followed by rubbing alcohol to enhance adhesion of the aluminum channels. Measure and mark precise positions for the mounting clips to guarantee an even alignment before you install. Each one-meter channel should be secured with two mounting clips for stability. Always cut your strip to fit specific cabinet dimensions to prevent installation issues and to maintain a polished appearance. Confirm the LED strip fits snugly within the channel prior to finalizing installation, as an improper fit can negatively affect color rendering and task lighting performance. Finally, verify the power supply connection is ready for peak function of the LED lights. Consider using metal adhesive strips that can support up to 1.5 pounds for added security in your installation.
Recommended Products

The HD14RGSG-STAGE3 high performance audio kit allows you to quickly upgrade your Harley-Davidson audio from ho-hum to holy-cow! The kit bolts to factory attachment points, and the direct connect wiring harnesses are specifically built for select 2014 - 2023 Harley-Davidson Road Glide and Street Glide models

The HD14RGSG-STAGE2 high performance audio kit allows you to quickly upgrade your Harley-Davidson audio from ho-hum to holy-cow with no modifications or compromises to the bike or its systems. No drilling or cutting required, kits bolt to factory attachment points, and the direct connect wiring harnesses are specifically built for select 2014 - 2023 Harley-Davidson Road Glide and Street Glide models

INCREDIBLE 12MP UHD IMAGE -- Mind-blowing 12 Megapixel PoE security camera system becomes affordable for your home and business security. Subtle details are recorded to ensure your peace of mind. Featuring an Ultra Wide 118° field of view, the IP cameras provide a full, beautiful view beyond comparison.
Troubleshooting Common Issues
Addressing issues that arise with LED channels under cabinets requires a systematic approach. Start by verifying all LED strip connections are secure and properly aligned with the correct polarity. If the LED strip light does not illuminate, verify the power supply is functioning and has sufficient wattage for the total length of strips. For even lighting, examine the installation distance from cabinet edges; adjust or add strips if necessary. Regularly inspect for visible wear on wiring and loose connectors, as these can trigger flickering or intermittent lighting. If dimming issues or color shifts occur, confirm all components, including the dimmer and power supply, are compatible with the LED strips used. This thorough troubleshooting guarantees peak performance. Consider installing LED strips with motion sensor features to improve safety and convenience in darker spaces while reducing energy consumption.
Frequently Asked Questions
Where to Mount a LED Strip Under a Cabinet?
For ideal LED strip placement under cabinets, position them 1 to 2 inches from the front edge, ensuring maximum brightness levels and improved kitchen aesthetics. Utilize adhesive methods and consider dimmer switches for customizable lighting effects.
What Are the Chances of LED Lights Catching Fire?
The chances of LED lights catching fire are minimal due to fire safety features, low heat generation, and adherence to installation precautions. Properly managing electrical components, materials, and power ratings further reduces risks associated with circuit overloads.
Do You Need an Electrician to Install Under Cabinet Lighting?
While a DIY installation offers tempting allure, consulting an electrician guarantees electrical safety. Proper light placement, wiring considerations, and maintenance tips enhance energy efficiency, aligning with modern design trends amidst various fixture types’ lighting choices and cost comparisons.
Are LED Strip Lights Good for Under Kitchen Cabinets?
LED strip lights are excellent for under kitchen cabinets, offering energy efficiency, diverse color options, and design aesthetics. Their dimming capabilities enhance kitchen ambience, while low heat output and longevity reduce cost considerations and maintenance issues.