As an Amazon Associate, we earn from qualifying purchases. Some links on this site are affiliate links at no extra cost to you. Our recommendations are based on thorough research and editorial judgment.
How to Replace Failed LED Sections
To replace failed sections of LED strip lights, first, inspect the entire strip for darkened areas and check voltage with a multimeter. Verify that the power supply outputs 12V or 24V and exceeds the strip’s wattage requirement. Examine solder joints for continuity and reflow damaged connections. If segments are damaged, use solderless connectors or solder replacements at designated cut lines. Insulate connections with heat-shrink tubing. Confirm proper functionality by testing voltage and illumination before evaluating for persistent issues.
Key Takeaways
- Identify the failed sections on the LED strip and locate the designated cut lines for replacement.
- Use solderless connectors to attach new segments, ensuring correct polarity during reconnections.
- For extensive damage, solder a new LED segment directly to the existing strip if necessary.
- Insulate all solder joints with heat-shrink tubing for protection against shorts and maintain reliability.
- Test the LED strip after replacing sections to confirm uniform brightness and proper functioning.
Identifying Issues With LED Strip Lights
You may be interested


How can one effectively identify issues with LED strip lights? Begin by inspecting the entire length of the strip for darkened or non-functioning sections. To identify issues, carefully examine copper pads and solder joints for signs of corrosion or looseness. These factors can impact connectivity markedly. Utilize a multimeter to check voltage at various points along the strip; voltage drop can often indicate problematic areas. Look for cut lines marked on the strip, ensuring reconnections are correctly polarized. If only a portion lights up, check the copper pads before and after the dark section to help locate the faulty area. Thorough inspections and measurements are key to restoring functionality effectively. When replacing sections, consider that energy efficient LEDs can reduce power consumption by up to 85% compared to traditional lighting options.
Checking the Power Supply
A thorough inspection of the power supply is essential for the proper functioning of LED strip lights. Begin by ensuring that the power supply outputs the correct voltage, typically 12V or 24V DC, as specified for the LED strip light. Use a multimeter to confirm this output matches the voltage rating on both the LED strip and power supply. Examine the power supply for visible damage, such as burnt components or frayed wires, which are common issues that may indicate a malfunction. Additionally, verify that the power supply’s wattage exceeds the total wattage requirement of your LED strip run to prevent overloading. If the LED strip remains non-functional, investigate connection issues or consider testing with a known working power supply. For optimal safety and performance, look for power supplies with over-current protection features that prevent device damage during operation.
Measuring Voltage on Copper Pads
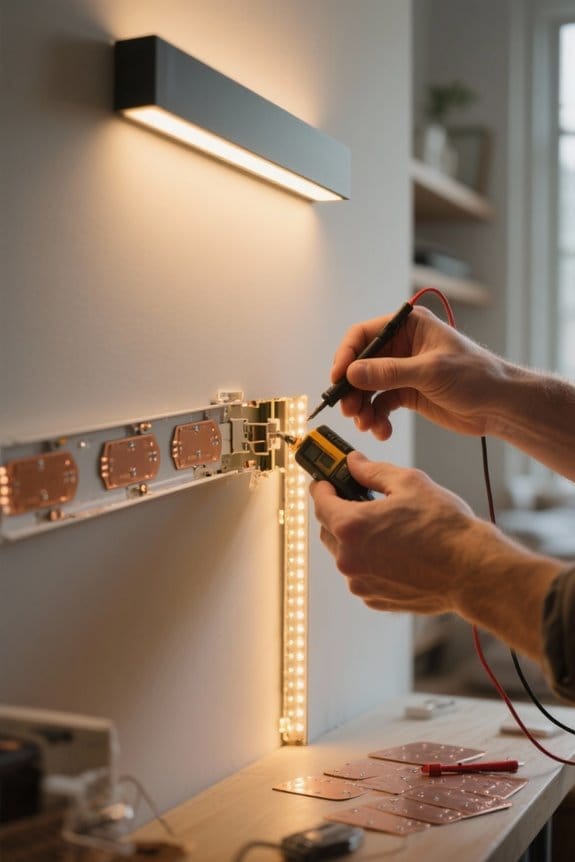
Measuring voltage on copper pads is essential for diagnosing LED strip issues effectively. Begin by using a DC voltmeter adjusted to the required voltage range—typically 12V or 24V. Place the positive (red) probe on the copper pad and the negative (black) probe on the ground or a negative copper pad to guarantee an accurate reading. It’s critical to measure voltage at various points along the strip, especially before and after any non-working sections. A voltage reading below the LED Strip Lighting’s rated requirement may point to poor connections or damaged sections needing repair. Always verify that the power supply is functioning correctly, delivering adequate voltage to the strip, to prevent any dimming or failure in specific sections. For optimal performance, maintain 2700K to 3000K color temperatures when replacing failed LED sections to ensure proper illumination and visual appeal.
Examining Connections and Solder Joints
After confirming the voltage on the copper pads of the LED strip, the next step involves examining the connections and solder joints that may affect performance. Inspect the LED strip thoroughly for any dark sections, signifying potential solder joint failures or loose connections that disrupt current flow. Focus on the solder joints on the copper pads; they must be secure and free from corrosion. Use a multimeter to measure continuity at these solder joints and along the strip. If continuity is lacking, damaged solder joints may need reflowing or additional solder to restore functionality. Additionally, check connector integrity, as improper alignment can also contribute to sections of the LED strip failing to illuminate. Quality LED strips with 700 lumens output provide optimal task lighting brightness when properly connected and maintained.
Replacing Damaged Segments
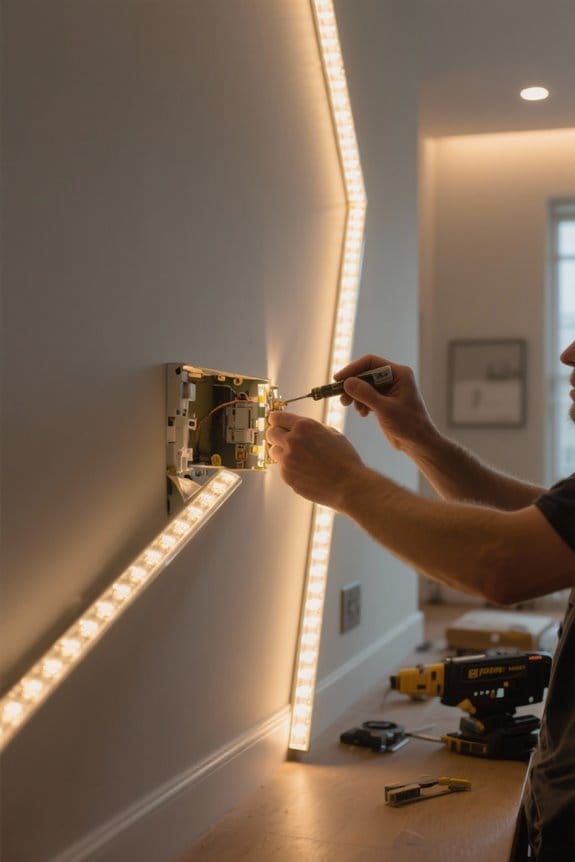
Identifying damaged segments of an LED strip requires careful observation and precision. To replace these segments, locate the cut line marked by a scissors icon. Carefully cut across this line to remove the faulty section. Next, use solderless connectors to reattach the remaining functioning segments, ensuring correct polarity by aligning the positive and negative copper pads properly. If the damaged segments are extensive, consider soldering a new LED strip segment directly to the existing strip. This provides a more lasting solution. Always insulate the joints with heat-shrink tubing for safety. After completing the repairs, power on the strip to test connections. If issues persist, recheck the connections and inspect for cold solder joints that may hinder functionality. Quality connectors rated for 72 watts capacity will help maintain consistent brightness levels across repaired sections.
Recommended Products

NO WIRE STRIPPING - With innovative copper clasp design, our wire splice connectors save you from Peeling or Stripping, Cutting, Soldering, even Welding wires like the Old School way. These 3 way wire connectors take care of all the connections with ease and keep everything clean and easy to manage, provide a much simpler and quicker installation process.

What you Receive:you will receive 100 pieces Solderless LED Tape Light Connector and 1 piece of screwdriver in total, coming with mini size, compact and practical, sufficient to meet your various using needs on different occasions

SYSTEM VERSATILITY | This is a key product for the Do it Yourself person who needs to connect Cut and Connect Strips . NO SOLDER NECESSARY The F connectors, 3.5mm x 1.3mm
Using Connector Clips for Repairs
Using connector clips for repairs presents an efficient solution for LED strip maintenance, enabling quick reconnections without the need for soldering. To properly utilize connector clips, align the copper pads of the LED strips with the metal contacts on the connector clip, ensuring correct polarity. This alignment is essential for maintaining functionality. Various types of connector clips are available, including 2-pin, 4-pin, and RGB connectors, allowing users to select the appropriate type based on their LED strip configuration. It’s important to choose connector clips compatible with the width and voltage of the LED strips, as mismatched clips can cause connectivity issues. After installation, always inspect the connections to verify they are secure, free from damage, and debris. Similar to LED cabinet lights, these connector clips provide a user-friendly DIY installation method that requires no professional assistance.
Recommended Products

Support AMD Ryzen 8000/ 7000 Series Desktop Processors

Designed for 9th 8th Generation Intel Core processors maximize connectivity and speed with Dual M. 2, USB 3. 1 Gen 2, onboard 802. 11AC Wi-Fi and ASUS optimum II for better DRAM overclocking stability

NEW DESIGNED LED NEON LIGHT WITH BIG POWER CONTROL BOX, 4 LIGHTING MODES AND 16 COLORS: This new arrival LED neon Strip Rope Light with 24key IR remote controller and 1500W big power LED controller box, it can directly light up to 100m led neon light, but no worry about voltage drop. There are 4 lighting modes available( Flash, Strobe, Fade, and Smooth), and 16 different dreaming colors changing, you can choose them according to different occasion
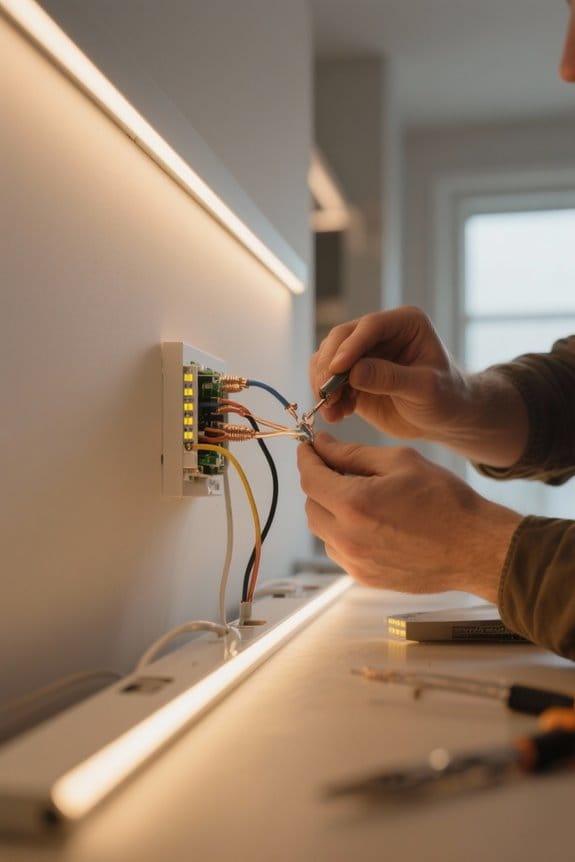
Soldering for Permanent Connections
Soldering creates a robust and enduring connection for LED strips, ensuring reliable performance over time. To begin, gather your soldering iron set to approximately 350°C (662°F) for ideal solder flow. Carefully remove insulation from the copper pads, exposing clean metal that will promote effective bonding. Position your positive and negative wires properly, ensuring they are aligned with the correct color coding. Next, apply solder to the joint, allowing it to melt and adhere to the pads without overheating the components. To prevent short circuits, consider using heat-shrink tubing for insulation around the soldered connections. Finally, affirm that your connections are secure and that polarity is correct, which is essential for maintaining LED functionality. Most modern LED retrofit kits provide up to 50,000 hours of reliable operation when properly soldered.
Recommended Products

【Easy Main Cable Installation】Built with a dedicated main cable system, this stair lighting kit allows all LED strips to connect through plug-in connectors for a cleaner and faster setup. No soldering or messy wiring required. Perfect for DIY indoor staircase lighting projects.
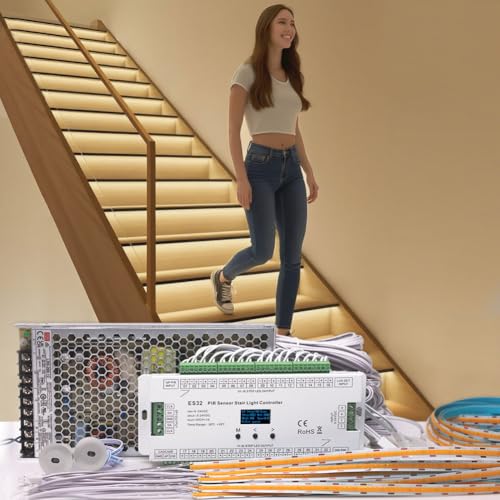
【Warm White Motion Triggered Stair Lighting System】Transform every step with soft 3000K warm white lighting that automatically turns on as you walk by and turns off when you leave. The ES32 controller lets you adjust brightness, lighting speed, and shut-off delay for a personalized experience.

50% LARGER SHEET, FASTER INSTALLATION: Each sheet measures 12"×24" (305×610mm) with 288 premium LEDs - 56% larger than standard 19"×9.6" sheets. Cover 12 sq ft with just 6 panels instead of 13+ traditional sheets. Fewer connection points mean more uniform light distribution, reduced installation time, and lower labor costs. Perfect for large-scale stone fabrication projects and commercial installations.
Ensuring Correct Polarity During Repair
Accurate identification of polarity is essential during the repair of LED sections, as misalignment can lead to significant circuit failure. Begin by locating the positive and negative pads on the LED light strip, typically denoted with a “+” and “-” symbol, or by distinct colors. Utilize a multimeter to confirm correct voltage and polarity before proceeding. When connecting clips, guarantee the metal contacts align correctly with the copper pads, as this maintains the correct polarity. If soldering, pay special attention to the orientation of connections; mismatches can irreparably damage the LED strip. When in doubt about polarity, consult the LED strip or manufacturer’s documentation to verify correct wiring and prevent costly mistakes during repair. Modern LED strips like the Armacost Lighting kit provide clear polarity markings and allow cutting and reconnecting for easier repairs.
Securing Connections With Electrical Tape
After verifying the correct polarity and securing the connections, the next step involves protecting those connections from potential damage. Utilize high-quality electrical tape rated for low voltage applications to insulate soldered connections effectively. This tape’s flexibility allows it to conform to the contours of the LED strip, which helps maintain a secure fit. Ascertain that all connections are dry and free from soldering flux before applying the tape, as proper adhesion is essential. Wrap the electrical tape tightly around the connections, but avoid excessive overlapping that could generate bulk and inhibit flexibility. This careful application will safeguard the repaired sections from short circuits and enhance the overall reliability of the LED strip. For optimal performance, ensure your LED strip’s wattage requirements are met by the power supply with at least a 20% buffer to prevent potential failures.
Recommended Products
ADJUSTABLE 3-in-1 RGB COLOR-TEMPERATURES: Tunable RGB Lighting for the ultimate custom-lighting control to create linear lighting effects in home or commercial properties. Linking accessories, controllers, receivers, power supplies, and extrusions are available for Trulux tape light (sold separately)

INCLUDES - 300 Square Foot Electric Floor Warming Mat 20" Wide x 180' Long (Consists of 2 mats that connect at thermostat) - Digital, Programmable, Radiant Floor Heating Thermostat with underfloor temperature sensor Model # TH115-AF-240. This Thermostat is easy to operate, 240 Volts and rated for 16 Amps. - Installation Warning Monitor (alarm sounds if wire is damaged during installation)

170-inch Diagonal, 1:1 Aspect Ratio. View Size: 120.0" H x 120.0" W. Overall Size: 129.7" H x 131.4" W x 3.1" D. White Case.
Testing the LED Strip After Repairs
Begin the testing process by powering on the entire LED strip to confirm functionality after repairs. Observe whether all segments, both new and existing, illuminate uniformly without flickering. To guarantee your LED strip operates correctly, use a multimeter to measure the voltage across the replaced sections—verify that it reads either 12V or 24V as required. Inspect the connections between the new segment and the existing strip for security; ensure there are no loose fittings or shorts. For RGB LED strips, cycle through various color settings to confirm appropriate response from the new section. Finally, conduct a visual inspection for any dim or non-lighting areas, which could indicate potential connectivity issues or component compatibility problems within your lighting solutions. Consider maintaining optimal brightness levels between 300-800 lumens for the best visibility and display quality.
Troubleshooting Common Problems
Identifying and resolving issues with LED strips can greatly enhance their longevity and performance. Start by examining the LED strip lights for dark or flickering areas, as these indicate potential problems. Use a multimeter to measure voltage at the copper pads surrounding any non-working sections, confirming an open circuit. If a failed section is detected, cut it out at the designated cut line. When reconnecting the remaining parts, utilize solderless connectors to facilitate a quick, effective repair. Make certain that polarity is correct during this process to avoid further functionality issues. After repairs, secure connections with heat-shrink tubing or electrical tape to protect against short circuits, enhancing the LED strip’s durability and operational reliability.
Choosing Quality LED Strip Products
When selecting quality LED strip products, it is essential to prioritize high-grade materials and reliable performance. Look for LED lights with durable backing and robust wiring to prevent issues like a broken LED strip. Opt for UL-listed products, which have undergone stringent testing for safety. Check specifications carefully; quality LED strips typically range from 12 to 24 watts per foot, adhering to efficiency standards without exceeding voltage limits. Seek products accompanied by a warranty, as this signifies the manufacturer’s confidence in their reliability. Additionally, choosing from reputable brands known for their consistent quality control will minimize installation problems. By following these guidelines, consumers can identify the best LED options available, ensuring a long-lasting, effective lighting solution.
Recommended Products

⭐ IP66 WATERPROOF & DUSTPROOF — COMMERCIAL GRADE DURABILITY Built for the harshest environments with IP66-rated waterproof and dustproof construction. Durable polycarbonate housing reinforced with stainless steel hardware stands up to moisture, dust, and debris in car washes, parking garages, barns, warehouses, food processing facilities, walk-in coolers, carports, gas stations, and wet outdoor applications.

💡【Edge-Lit Innovation Full Mirror Premium Glow】Unlike central-strip designs that reduce usable mirror area, our outer-edge sandblasted frosted LED strip maximizes mirror space for clear, unobstructed grooming. More decorative than lamp-shaded styles, it maintains elegant aesthetics when lit or off. To address the common dimness issue in sandblasted strips, we widened it to 1 inch—delivering both premium aesthetics and bright, cozy bathroom lighting in one.

Focused Lighting & Beveled Design - This LED medicine cabinet features inward beveled light strips for concentrated lighting. The lighting layout helps reduce direct glare for a gentle lighting experience. The beveled edges of the mirror match the overall design, improving the product's refined appearance.
Frequently Asked Questions
How to Fix a Section of LED Lights Not Working?
Although troubleshooting LED malfunction seems challenging, proper LED strip maintenance can simplify the process. Inspect connections, measure voltage, and repair any damaged segments. Ironically, the smallest oversight often leads to the most illuminating discoveries in repairs.
Do I Need an Electrician to Replace LED Lights?
An electrician is generally unnecessary for replacing LED lights, as LED troubleshooting tips and DIY electrical safety allow individuals to manage various LED lighting types effectively. Basic tools and guidelines are typically sufficient for most repairs.
How to Reattach Cut LED Strips?
To reattach cut LED strips, one can use LED strip connectors for easy reconnection, apply soldering techniques for durability, and consider adhesive options for secure mounting, preventing disconnection and ensuring consistent performance of the strips.
Can You Replace LED Strips in Lights?
Yes, one can replace LED strips in lights, confirming compatibility with LED strip types and LED power sources. This DIY lighting solution requires careful inspection of connections and correct polarity to guarantee peak functionality and safety.