As an Amazon Associate, we earn from qualifying purchases. Some links on this site are affiliate links at no extra cost to you. Our recommendations are based on thorough research and editorial judgment.
Tools You Need for DIY LED Installation
For DIY LED installation, essential tools include wire strippers for precise wire handling, screwdrivers to secure components, and a voltmeter to monitor voltage levels, typically 12V or 24V. Use wire connectors, electrical tape, and heat shrink to guarantee safe connections. A solder iron enhances durability for those seeking robust connections. Mounting clips stabilize LED strips, while a suitable power supply, ideally 12V with at least 2A per 5 meters, supports your setup. Additional tools and techniques can enhance your project further.
Key Takeaways
- Use wire strippers for clean cuts and accurate insulation stripping to enhance installation efficiency and minimize wiring mistakes.
- Securely fasten LED strips with mounting clips or brackets to prevent sagging and ensure a polished appearance.
- Monitor voltage levels with a volt meter to identify connectivity issues during installation and prevent dim or flickering lights.
- Opt for a reliable power supply, providing 12V with a minimum of 2A per 5 meters to prevent damage to your LED strips.
- Consider an LED controller for easy color and brightness adjustments, ensuring compatibility with RGB strips for added functionality.
Wire Strippers
You may be interested

When undertaking a DIY LED installation, having the right tools is essential, and wire strippers play a significant role in guaranteeing success. These tools are specifically designed to cut and strip 16-22 AWG stranded wires, making them perfect for prepping connections between LED strip lights, power supplies, and controllers. Properly utilized, wire strippers provide clean cuts and accurate stripping of insulation, vital for achieving reliable electrical connections. This attention to detail enhances installation efficiency and minimizes mistakes. Investing in a quality pair of wire strippers will improve the accuracy of your work and lessen the risk of damaging wires during installation. For ideal results, always verify that your wire length is appropriate before connecting components. Using the correct wire gauge specifications helps prevent connector failure and maintains optimal brightness levels throughout your LED strip installation.
Screwdrivers
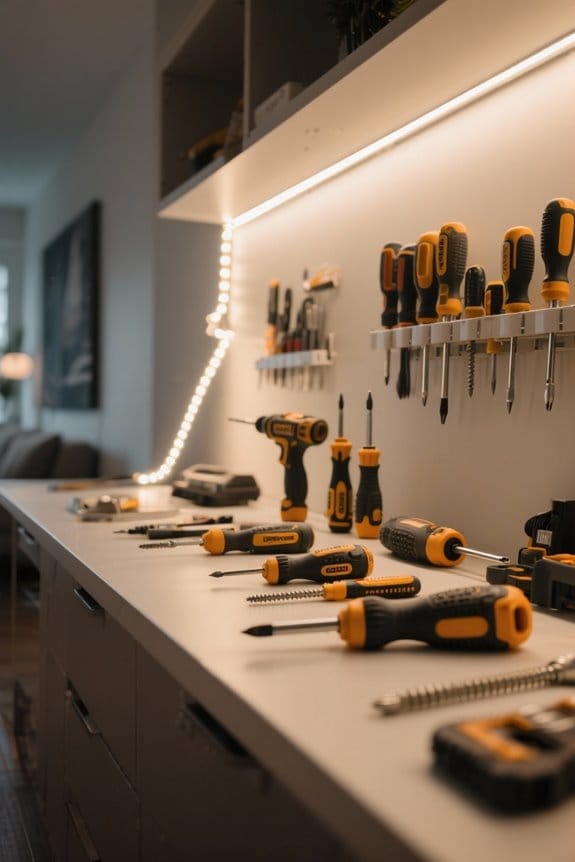
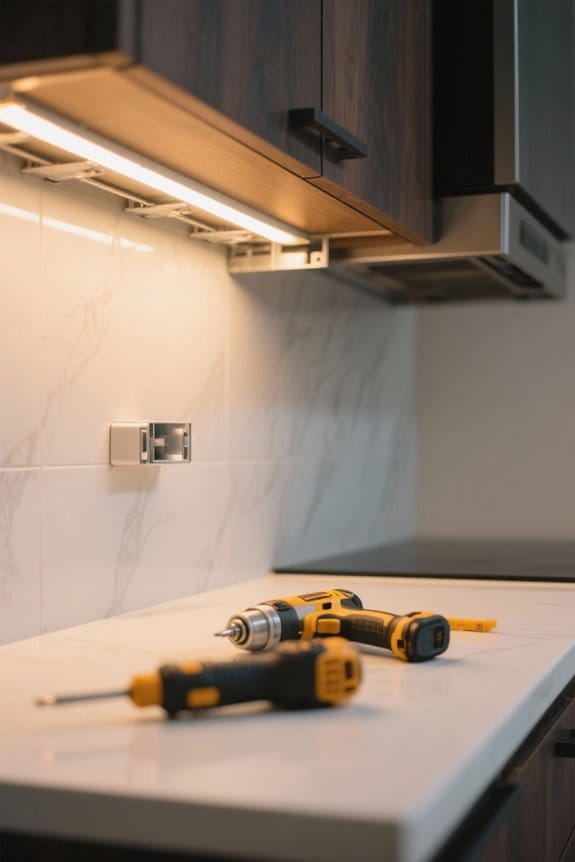
A reliable set of screwdrivers is critical in any DIY LED installation, ensuring that all components are securely fastened for maximum performance. Typically, a mini flathead or Phillips screwdriver is required to install LED strip lights effectively. For certain products, a standard size Phillips screwdriver may be necessary. Using screwdrivers of the correct size helps prevent stripping screws, which can lead to connection issues or potential damage. Quality screwdrivers not only enhance the efficiency of your installation process but also save time on adjustments. When tackling multiple electronic projects, these versatile tools prove invaluable. Always have both types on hand for various tasks related to LED lighting and beyond. Proper tools pave the way for a successful, professional-looking installation. The screws included with LED mounting clips provide additional stability when installing strip lights in areas where adhesive alone may not suffice.
Recommended Products

This Father's Day, surprise your loved ones with our man of God gifts for men, packed in a convenient 120 Pcs/30 Set bundle; The set includes 30 mini flashlights (3 AAA batteries required, batteries not included), 30 Christian pens, 30 inspirational cards, and 30 OPP bags; This bulk collection is ideal as Christian gifts for men, addressing various occasions like birthdays, Father's Day, and spiritual gatherings

PRECISION BATTERY-POWERED DRIVER: This portable electric precision screwdriver is the perfect tool to disassemble & assemble electronics/devices; The cordless aluminum driver is battery powered (2xAAA incl.); LED light, buttons for forward and reverse modes
Volt Meter
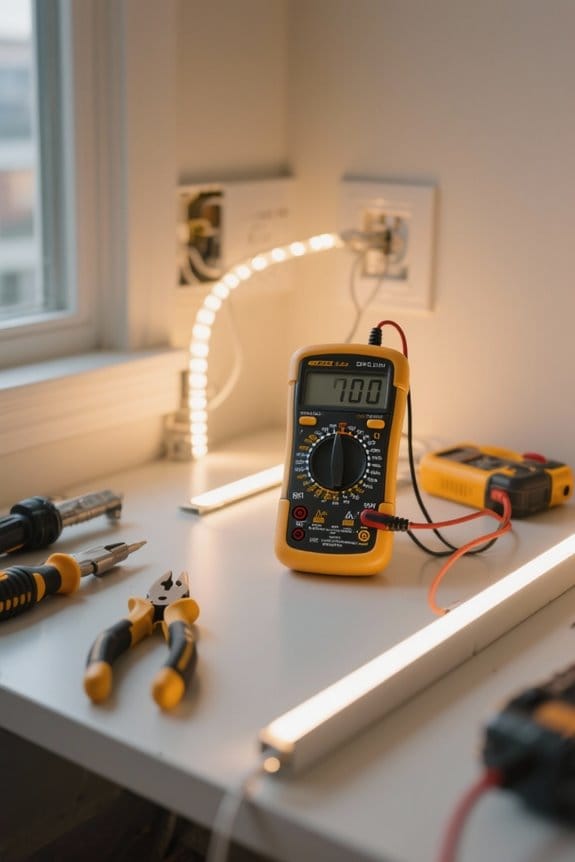
Completing a successful LED installation requires more than just secure components; it also demands careful monitoring of electrical conditions. A volt meter, or multimeter, is essential for ensuring proper voltage levels in your setup. Use it to confirm your power supply delivers the correct voltage, typically 12V or 24V, needed by your LED strips. Monitoring voltage drops is critical; a significant drop can lead to dim lighting or flickering. Regularly testing with a volt meter helps identify connectivity issues after installation, maintaining reliable operation of your lighting system. Furthermore, ongoing checks for voltage irregularities aid in preventing performance problems. Testing is particularly important when installing high-lumen LED bars that require precise power management for optimal performance. To conclude, integrating a volt meter into your toolkit is imperative for any serious DIY LED project.
Recommended Products

🌈🌈【Autel Ultra S2: The Best Investment in 2026】Full-level up of the Autel Ultra/Ultra EV/MS909/Elite II Pro, 2026 flagship scanner Ultra S2 covers 15,000 models worldwide and features the Motor TruSpeed Repair Service. highlights include 👍Topology Mapping 3.0, 👍J2534 Programming & Coding, 👍Data-Driven Diagnostics with Enhanced PID Analysis, 👍Hands-F.ree Virtual Assistant (Siri), 👍EV Testing, 👍48+ Services, and 👍10+ High-End Functions for large auto workshops.
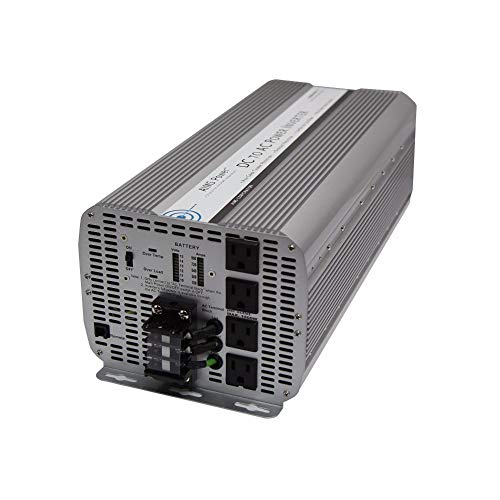
High Capacity Mobile Power: Delivers 8000 watts continuous power and 16000 watts surge capability, supporting startup loads from motors, pumps, and power tools.

High Capacity 2500W Mobile Power: Converts 12V DC battery power into 120V AC electricity, allowing users to operate tools, appliances, and equipment wherever traditional power is unavailable.
Wire Connectors, Electrical Tape, and Heat Shrink
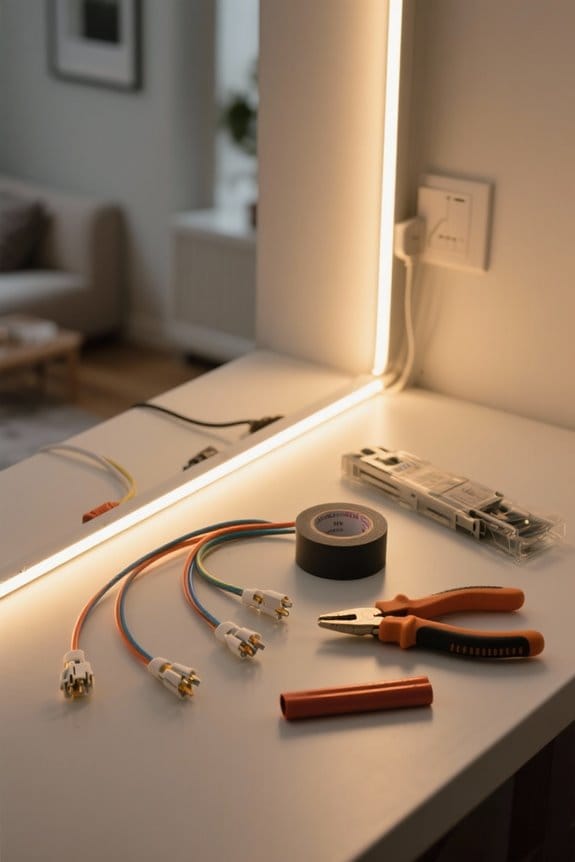
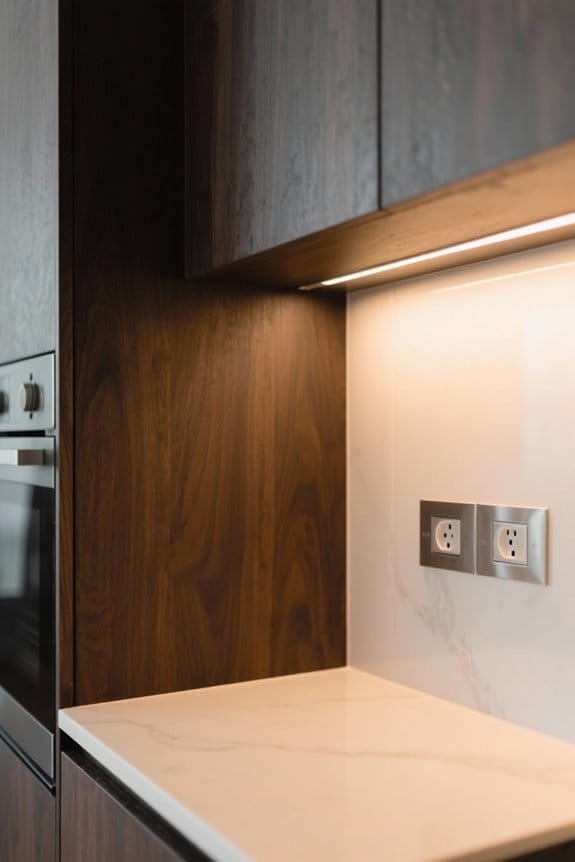
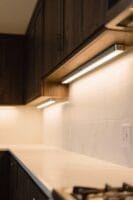
Essential components for any LED installation include wire connectors, electrical tape, and heat shrink tubing. Wire connectors, such as wire nuts or quick connectors, guarantee secure and reliable electrical contacts, vital for peak performance. When working with wires, always install electrical tape to insulate connections effectively, preventing hazardous short circuits. This essential step enhances safety, especially in low-voltage setups. Additionally, heat shrink tubing serves as a protective barrier for soldered joints; it provides durability, keeping connections intact against wear and environmental factors. Choose appropriate sizes, typically ranging from 1/16 to 1/2 inch in diameter, to fit your wires snugly. Utilizing these tools together considerably improves the durability and reliability of your LED lighting projects, assuring they function effectively over time. For optimal results when installing under cabinet lighting, ensure proper wire management to maintain the sleek, modern aesthetic while achieving brightness levels between 1,500 to 2,500 lumens.
Recommended Products

Included Items: Pure Copper Cable (select cable gauge, insulation color and length using the selection tabs) + 5pcs 5/16" STUD Copper Cable Lugs + 5pcs 3/8" STUD Copper Cable Lugs + 3 Feet Black Heat Shrink Tubing. Save time and money by purchasing all components in one product listing.

USA FAMILY-OWNED COMPANY: Master Appliance has manufacturing high quality industrial heat guns since 1958. Located in Racine, WI with over 60 years of experience in the heat tool industry, you can find Master’s heat guns like this PH-1400A variable temperature, LCD digital electric heat gun, trusted and in the hands of professionals in some of the most well-known manufacturing facilities worldwide.
Includes 1/0 AWG Pure Copper Cable + 10pcs 1/0 AWG Copper Cable Lugs + 3 Feet Black Heat Shrink Tubing. Save time and money by purchasing all components in one product listing.
Solder Iron (Optional)
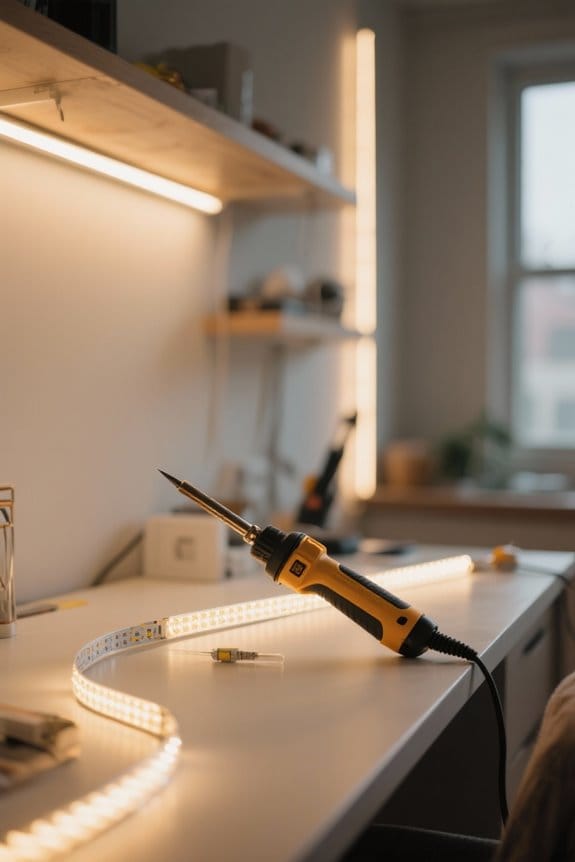
Incorporating a soldering iron into LED installations greatly enhances the strength and longevity of electrical connections. When modifying LED strip lights, precise soldering creates robust connections that are superior to quick connectors, ensuring better electrical efficiency. For best results, start by tinning the wire ends and applying heat evenly to prevent damage. A temperature range of 350°F to 400°F is ideal for effective solder joints. Although a soldering iron is optional, it is highly recommended for serious DIY projects where durability is essential. Beginners can find numerous instructional resources and video guides online to master effective soldering techniques. By using a soldering iron, you enhance the reliability of connections in your LED installations, leading to a more successful project outcome. With proper soldering techniques, you can achieve the same 50,000 hour lifespan as professional-grade LED cabinet lighting installations.
Scissors
When undertaking an LED installation project, the use of scissors plays an essential role in achieving precise and efficient results. Sharp and precise scissors are vital for cutting LED strip lights at designated safe cut areas, ensuring the integrity of the circuitry remains intact. Familiarize yourself with the marked cut points on the strips, typically indicated by lines or tabs, as these areas are designed for peak performance post-cutting. When cutting multiple strips, measure accurately to avoid excess material and achieve the best fit for your installation. Additionally, scissors can be used to trim excess wiring or adhesive backing, which helps create a polished appearance. Employ these techniques for a successful and professional LED installation. For optimal lighting performance, aim to maintain 100 lumens per foot when planning your strip light segments.
Tape Measure
A reliable tape measure is essential for achieving accuracy in LED strip light installations, making it an indispensable tool. This device enables users to obtain precise measurements of the areas designated for LED strip lights, guaranteeing a perfect fit and minimizing cutting errors. Most tape measures come with both metric and imperial units, providing versatility for various projects. Always account for extra length to navigate bends or fixtures effectively. A high-quality tape measure should offer a sturdy case and a locking mechanism, which enhances stability during use. Regularly check the calibration of the tape measure to verify accurate measurements, as precision is vital for the successful installation of LED strip lights. Invest in this essential tool for the best results. When measuring for aluminum LED channels, ensure your measurements accommodate strips up to 12mm wide for proper fitting.
Cleaning Supplies
Effective cleaning supplies are essential for the successful installation of LED strip lights. Begin with rubbing alcohol and a lint-free cloth to eliminate dirt and grease from surfaces. In areas with heavy contamination, a degreaser provides thorough cleaning. Make certain the surface is completely dry afterwards, since moisture can compromise the adhesive backing of the LED light strip. Regular cleaning of the strips using a soft cloth helps maintain performance by preventing dust and grime buildup. For best results, consider cleaning the LED strips every month. Choosing appropriate cleaning supplies not only prepares the surface for installation but also enhances the longevity of the LED strips by securing a strong bond. Prioritize cleanliness for a flawless installation experience. Proper maintenance of LED technology contributes to lower heat output and extended product life.
Mounting Clips or Brackets
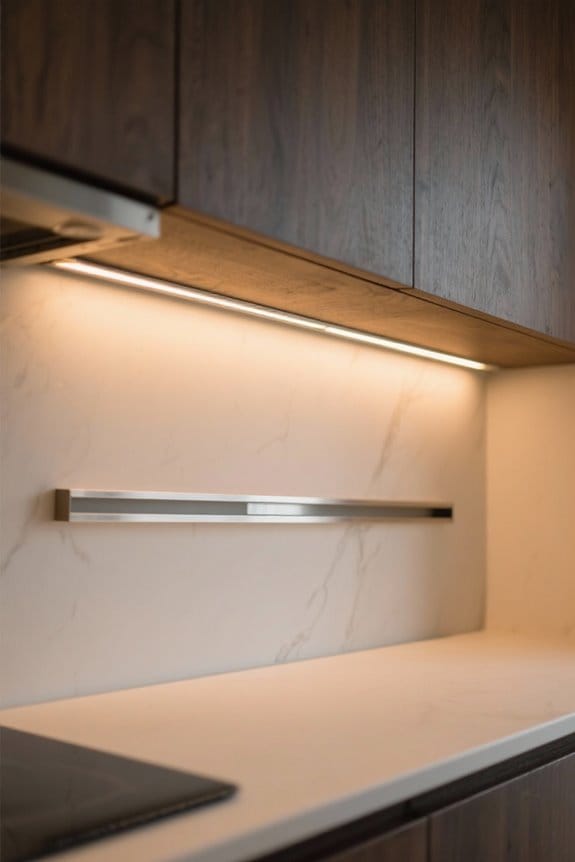
Mounting clips or brackets serve as essential components in the installation of LED strip lights. These tools secure the strips, particularly in areas where adhesive may falter due to surface texture or environmental factors. Using mounting clips prevents sagging, ensuring a polished and professional appearance. Available in various materials, such as plastic or metal, they accommodate different LED strip widths, making them versatile for indoor or outdoor setups. The installation of mounting brackets typically requires minimal tools, often just a screwdriver or drill. By utilizing clips, one can enhance the longevity of LED installations, reducing strain on the adhesive and allowing for easier adjustments when necessary. Prioritize these components for a successful LED strip lights installation. For optimal weight distribution and secure attachment, multiple clip placement is recommended when installing longer lengths of LED strip lighting.
Recommended Products

【All in One Kit】- The whole 170Ft kit comes with 2x 85Ft single run waterproof strip light + 1x RF remote & controller + 1x power suppply (standard US plug) + mounting clips & screws + double sided adhesive tape + 90 degree L shaped connectors
【All in One Kit】- The 185Ft kit comes with two (90Ft+95Ft) single run waterproof strip light + waterproof bluetooth controller + waterproof power suppply (standard US plug) + mounting clips & screws + double sided adhesive tape + 90 degree L shaped connectors
[ All in One Kit ] - The 155Ft kit comes with two (75Ft+80Ft) single run waterproof strip light + waterproof bluetooth controller + waterproof power suppply (standard US plug) + mounting clips & screws + double sided adhesive tape + 90 degree L shaped connectors
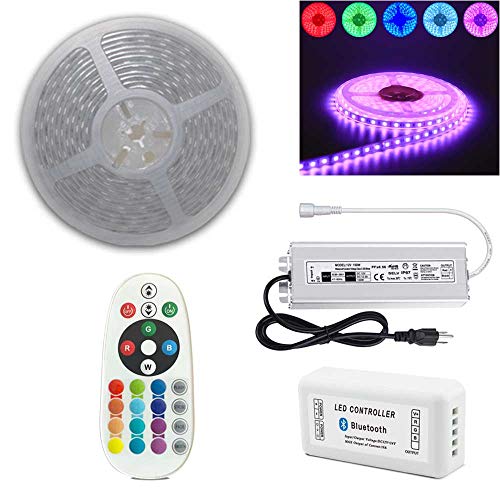
LED Controller
LED controllers play a significant role in the functionality and versatility of RGB LED strips. These devices enable users to change colors and adjust brightness easily, often through remotes or app interfaces. Utilizing Pulse Width Modulation (PWM) signals, an LED controller manages the voltage supplied to the LEDs, facilitating smooth color changes and dimming. Consider modern controllers that offer smart home integration; this allows for voice control and automation. When selecting an LED controller, assess its compatibility with your RGB LED strip and make sure it meets power requirements to prevent overheating. With some RGB controllers, you can achieve multi-zone control, synchronizing lighting effects across various areas for a cohesive ambiance. Choose wisely for peak performance. Popular models like the Leeleberd LED controller feature music sync capabilities and up to 64 scene modes for enhanced customization.
Power Supply
A reliable power supply is essential for the successful operation of any LED lighting project. Most LED strips require a 12V power supply, demanding a minimum of 2A for every 5-meter length to prevent damage. For setups with multiple strips, consider using a computer power supply, utilizing yellow wires to deliver clean 12V DC power while discarding extra wires. It is wise to power each 5-meter strip individually to avoid overloading, which may lead to flickering or failure. Using regulated 12V 5A converters is advisable when connecting to mains power, as direct connection is discouraged. Additionally, pre-wired connectors and plug-and-play options simplify your setup, ensuring efficient installation of LED lighting systems.
Connector Cables
When creating an effective LED lighting system, connector cables play an essential role in linking segments of LED strips and facilitating versatile configurations, especially around bends or corners. These cables typically feature connectors that align precisely with the pads on the LED strips for secure connections. For ease of installation, consider using pre-wired connector cables, which allow quick plug-and-play setups without soldering. It is critical to choose the appropriate type based on your LED strip setup, whether single-color or RGB. For installations exceeding 10 meters, use additional connector cables to guarantee consistent power distribution and prevent voltage drops. This attention to detail enhances overall performance and reliability in your DIY LED projects.
Frequently Asked Questions
What Is Needed to Install LED Lights?
To install LED lights successfully, one must gather an array of tools symbolizing preparation: wire strippers, screwdrivers, and safety gear. Understanding various LED light types and proper mounting techniques guarantees a secure and safe installation process.
What Tools Do I Need to Connect LED Strips?
For LED strip installation, necessary tools include electrical connectors for secure connections, a power supply to guarantee proper functionality, and optional items like wire strippers and a soldering iron for customized lengths and ideal performance.
Can You Install LED Lights Yourself?
Yes, one can install LED lights themselves, enjoying the benefits of energy efficiency. Safety considerations include proper measurements and connections. Beginners should heed tips like cutting at designated areas to guarantee successful installations without complications.
Do I Need an Electrician to Install LED Lights?
Whether one needs an electrician for LED installation depends on complexity. DIY safety tips suggest hiring professionals for intricate setups, as it mitigates risks, whereas simple tasks can be manageable. Consider electrician requirements and LED installation costs before deciding.